
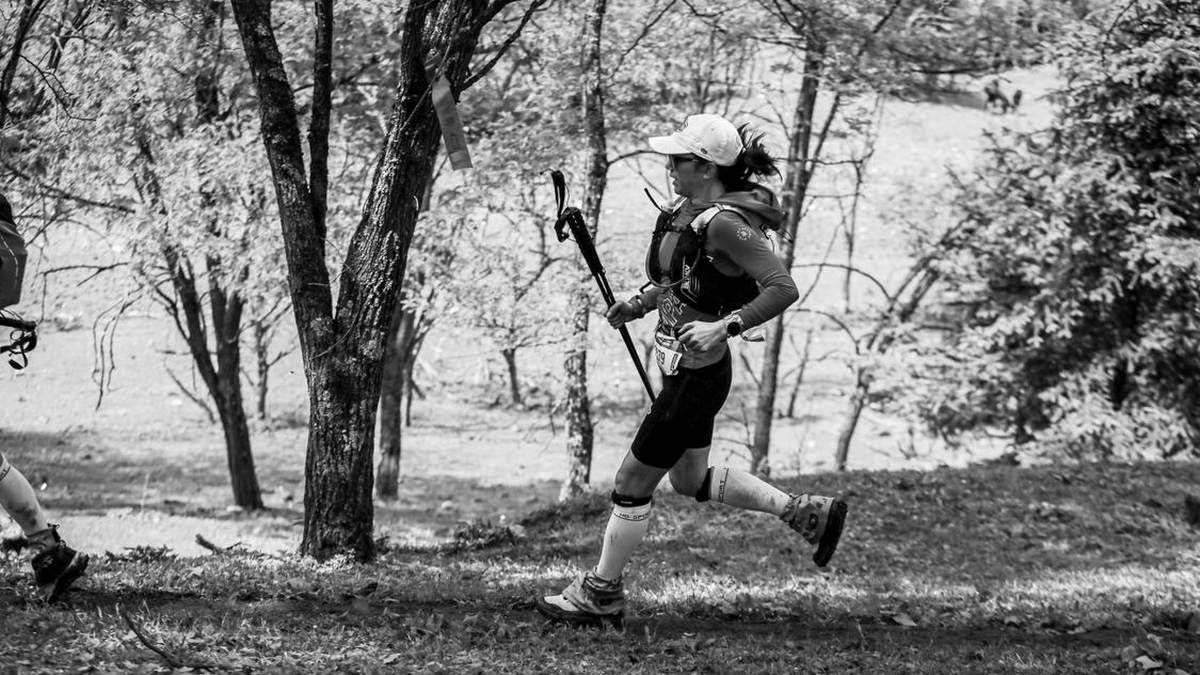
If you’ve spent most of your running life on neighborhood sidewalks and paved park loops, your first five minutes on a dirt trail can feel like a minor reality check. Your breathing climbs faster than usual, your ankles have to work on uneven ground, and the pace on your GPS watch looks nothing like your normal road splits. Plenty of road runners finish their first trail outing wondering why three miles in the woods felt harder than five miles on asphalt.
Here’s the good news: nothing’s wrong with your fitness. Learning how to start trail running is mostly about dropping your road-running habits at the trailhead. Once you stop staring at your watch pace, shorten your stride over roots and rocks, and give yourself permission to hike the steep climbs, you’ll find that trading traffic noise for shaded dirt paths is one of the most rewarding ways to run. When comparing rugged trail footwear, many beginners start with a protective hiker-runner hybrid like the one in our Merrell Moab Speed 2 review or the wide-forefoot option in our Topo Ultraventure 4 review.
Starting Trail Running: What You Need to Know
- 1. Why Trail Running Feels Harder Than Road Running (At First)
- 2. How to Pick Your First Beginner-Friendly Trail
- 3. Do You Actually Need Trail Running Shoes Right Away?
- 4. Trail Running Form: Short Steps, Eyes Ahead & Hiking the Hills
- 5. Pacing by Effort Instead of Your GPS Watch
- 6. Essential Gear, Hydration & Trail Etiquette
1. Why Trail Running Feels Harder Than Road Running (At First)
On a flat road, almost every step is identical. Your foot lands on a predictable, level surface, your tendons act like springs, and you can zone out for miles at a steady rhythm. Dirt trails throw that predictability out the window in the best way possible.
Every time your foot lands on slightly angled dirt, loose gravel, pine needles, or a tree root, the small stabilizing muscles around your ankles, calves, knees, and hips fire to keep you balanced. At the same time, softer dirt absorbs a little more of your push-off energy than hard concrete does, and rolling elevation changes force your heart rate up and down.
That’s why trail running builds serious lower-leg strength while giving your joints a break from repetitive pavement pounding. Instead of hitting the exact same muscle fibers at the exact same angle ten thousand times in a row, the trail spreads the workload across your entire lower body. You’ll probably feel a little sore in your calves, shins, and outer hips after your first couple of dirt runs, and that’s completely normal.
2. How to Pick Your First Beginner-Friendly Trail
The biggest mistake new trail runners make is picking a steep, rocky mountain singletrack for their very first run just because it looks scenic on Instagram. Not all trails are created equal, and you’ll have a much better time if you ease into off-road surfaces gradually.
Start on Non-Technical “Green Circle” Surfaces
Think of trail surfaces on a simple three-level scale before you head out:
- Level 1 (Smooth & Non-Technical): Crushed limestone rail-trails, wide dirt fire roads, canal towpaths, and groomed county park loops. These paths are wide enough to run side-by-side, have gentle grades, and have almost no rocks or roots to trip over.
- Level 2 (Flowy Singletrack): Narrower dirt paths winding through wooded parks or nature preserves with rolling hills, occasional tree roots, and packed dirt. You’ll need to watch your footing, but the terrain is still very runnable.
- Level 3 (Technical Trail): Steep climbs, jagged rock gardens, exposed root webs, creek crossings, and loose scree where hiking and careful footwork are mandatory.
Spend your first two or three trail outings on Level 1 or easy Level 2 park loops. Apps like AllTrails, Trail Run Project, and Strava Maps make it easy to filter local routes by elevation gain, download offline GPS tracks, and check recent trail condition photos so you know what the ground actually looks like. Aim for a loop with less than 100 feet of elevation gain per mile for your first few runs.
3. Do You Actually Need Trail Running Shoes Right Away?
If you’re heading out for your very first run on a dry, packed-dirt park path or crushed-gravel rail trail, you don’t need to buy new footwear before you start. Your regular everyday road trainers will handle smooth, dry dirt just fine.
However, once you venture onto wooded paths with loose gravel, wet leaves, mud, or rocky climbs, standard road shoes show their limits quickly. Road outsoles use flat, smooth rubber that slips on loose dirt, and thin road uppers don’t offer much protection if you accidentally stub your toe on a hidden root.
Hybrid Road-to-Trail Shoes vs. Dedicated Trail Shoes
For most beginners, the smartest first purchase isn’t an aggressive mountain shoe with deep cleats. Instead, look at road-to-trail running shoes, which bridge the gap between pavement comfort and off-road grip.
A hybrid crossover model uses shallow 3mm to 4mm rubber lugs that bite into dirt and gravel without feeling clunky on the paved road leading to the trailhead. For example, our Brooks Ghost Trail review breaks down how Brooks took their classic everyday road cushion and added sticky 3mm TrailTack Green lugs and a protective toe bumper for park trails. If you want even more underfoot foam for long gravel miles, check out our HOKA Challenger 8 review for a max-cushioned crossover option.

- ✓36mm heel and 28mm forefoot stack cushion hard gravel and neighborhood asphalt without feeling tippy on uneven dirt.
- ✓3mm TrailTack Green rubber lugs grip packed dirt, pine needles, and crushed stone without humming on pavement.
If your local trails are steep, muddy, or rocky right from the parking lot, skip the hybrids and browse our guide to dedicated trail running shoes with deeper 4mm to 5mm multi-directional lugs and stiffer underfoot rock protection. As we cover in our Saucony Peregrine 16 review, stepping up to a sticky 5mm Vibram Megagrip lug pattern and a lower 4mm drop gives your feet locked-in grip on slick mud, wet tree roots, and loose singletrack climbs.

- ✓5mm Vibram Megagrip rubber lugs bite into slick mud, loose gravel, and steep dirt climbs without slipping.
- ✓Low 4mm drop with a 32mm heel and 28mm forefoot stack keeps your ankles stable over roots and uneven rock.
4. Trail Running Form: Short Steps, Eyes Ahead & Hiking the Hills
Good trail technique comes down to three simple adjustments that keep you upright and save your legs from burning out early.
Scan 10 to 15 Feet Ahead (Don’t Stare at Your Toes)
When beginners hit a rooty section of trail, their natural instinct is to look straight down at their feet. Unfortunately, if you’re staring at the root right in front of your toes, it’s already too late to react. Train yourself to keep your chin neutral and scan the trail 10 to 15 feet ahead. Your brain is remarkably good at taking a quick mental snapshot of upcoming rocks and roots and guiding your feet around them in your peripheral vision.
Shorten Your Stride and Lift Your Feet Slightly
Long, reaching strides are a recipe for stubbed toes and twisted ankles on uneven dirt. Shorten your steps, keep your feet landing directly underneath your hips, and imagine running with quick, light feet as if you’re stepping over hot coals. Widening your arm swing slightly on twisty or uneven sections also acts like a balance pole to steady your torso.
Power-Hiking Steep Hills Is a Strategy, Not Giving Up
On the road, many runners treat walking like a mental defeat. On the trails, walking steep climbs is universal strategy. Even elite ultramarathoners power-hike steep grades because once an incline pitches past 10 to 15 percent, hiking briskly uses far less oxygen and muscle glycogen than trying to bounce uphill at the exact same speed.
When a climb gets steep, switch early to a purposeful power-hike before you’re gasping for air. Lean slightly forward from your ankles, take short steps, and press your palms against your upper thighs on steeper steps to help push yourself up the hill. Using the run-walk method on rolling trail terrain lets you crest the top of a climb with steady breathing so you can start jogging again right away.
5. Pacing by Effort Instead of Your GPS Watch
If you normally run 9:30 miles on flat neighborhood roads and try to force a 9:30 pace on a hilly wooded singletrack, you’ll blow up in the first ten minutes. Between elevation gain, tight turns, and uneven footing, most runners naturally run 1 to 3 minutes per mile slower on trails than on roads at the exact same effort.
Run by Time and Breathing, Not Distance
For your first month on the trails, plan your workouts by minutes rather than miles. Instead of telling yourself you need to run 4 miles, head out for a 35- or 40-minute run at a conversational effort where you can still speak in full sentences.
If you’re curious how much a hilly trail loop actually slows down your flat-ground pace, you can plug your distance, pace, and elevation gain into our Grade Adjusted Pace Calculator below to see the true flat-road equivalent of your climb.
See Your True Effort on Hills: Grade Adjusted Pace Calculator
Wondering why an 11:00/mile trail climb felt like an 8:30/mile road tempo? Enter your trail distance, time, and elevation gain to calculate your exact flat-ground equivalent pace.
6. Essential Gear, Hydration & Trail Etiquette
Once you leave neighborhood streets behind, you won’t pass gas stations or park water fountains every mile, and a simple 4-mile trail loop can take longer than you expect. A little preparation keeps every outing stress-free.
Carry Water and a Charged Phone
Even on a 35-minute beginner trail run, carry water and a fully charged phone with your route downloaded for offline viewing. Because trail runs take longer per mile and shaded woods can still get humid quickly, use our Hydration Calculator to estimate your fluid needs before heading out.
If you hate holding a bottle in your hand while keeping your balance on uneven ground, learning how to choose a running hydration vest makes a huge difference on the trail. A snug vest sits high on your ribs so you’ll carry front soft flasks, your phone, keys, and an emergency gel while keeping your hands completely free to catch your balance. You can also compare our top-tested running hydration vests if you’re shopping for your first pack.
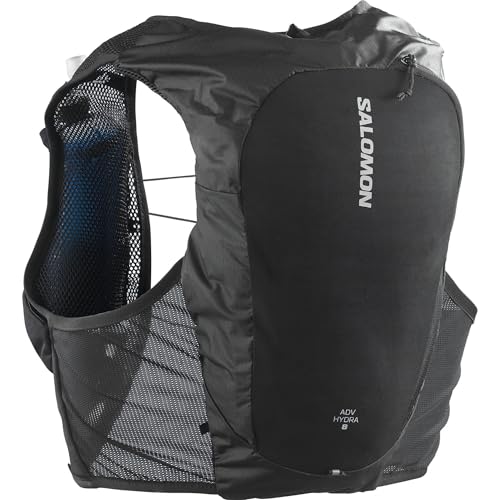
- ✓Includes two 500ml soft flasks up front that shrink as you sip so water never sloshes on downhills.
- ✓Elastic sternum cords expand naturally with heavy breathing on climbs while keeping 8 liters of storage locked against your back.
Dress for Brush, Bugs, and Changing Weather
Skip cotton socks, which trap moisture and cause blisters the first time you step through wet grass or a shallow puddle. Quarter-crew or crew-length merino wool or synthetic running socks protect your ankles from flying dirt, burrs, and poison ivy. On cooler mornings, pair moisture-wicking shorts or running leggings with a lightweight wind shell that packs into a pocket once you warm up on the first climb.
Know the Golden Rules of Trail Etiquette
Sharing a narrow dirt path is a lot easier when you know who has the right of way:
- Uphill Traffic Has the Right of Way: Uphill runners and hikers have a narrower field of vision and are working hard to keep their momentum, so downhill runners should step aside to let uphill traffic pass. (That said, plenty of friendly uphill hikers will wave you through anyway!)
- Yield to Hikers and Horses: Runners yield to walkers and hikers, bicycles yield to both runners and hikers, and everyone yields to horses.
- Announce Yourself Kindly: When approaching someone from behind on singletrack, call out “Passing on your left whenever you have a spot!” a few seconds early so you don’t startle them. Skip noise-canceling headphones or keep one ear open so you can hear mountain bikers, wildlife, and other runners.
- Run Through the Puddle, Not Around It: Stepping off the edge of a muddy trail to keep your shoes clean widens the path and causes trail erosion. Stay in the center of the trail even if your shoes get a little dirty.
Wrapping Up: Your First 4-Week Trail Transition Plan
You don’t need to overhaul your entire weekly training schedule to become a trail runner. The easiest way to build ankle strength and confidence without overloading your calves is to swap just one easy run per week from pavement to dirt:
- Week 1: Run 25 to 30 minutes on a flat crushed-gravel path or wide dirt park loop at an easy conversational effort.
- Week 2: Run 30 to 35 minutes on a rolling wooded park trail, purposefully walking any hill that takes more than 15 seconds to climb.
- Week 3: Practice scanning 10 to 15 feet ahead and taking quick, short steps on a 35- to 40-minute singletrack loop.
- Week 4: Stretch your weekend trail run to 45 or 50 minutes, focusing entirely on breathing effort and enjoying the scenery rather than checking your watch pace.
Leave the pace pressure on the pavement, start on a gentle local loop, and let your legs adapt naturally over a few weeks.
Frequently Asked Questions
Is trail running harder than road running?
Minute for minute, yes. Uneven footing, roots, rocks, and rolling hills recruit stabilizing muscles in your ankles, hips, and core that don’t work as hard on flat asphalt. Most runners find their trail pace is 1 to 3 minutes per mile slower than their road pace at the exact same heart rate and breathing effort.
Can I wear my regular road running shoes on a trail?
For dry, flat, non-technical surfaces like crushed gravel paths, dirt canal towpaths, or wide park trails, your regular road running shoes work fine for your first few outings. Once you move onto trails with loose dirt, tree roots, wet leaves, or rocky climbs, switching to a hybrid road-to-trail shoe or dedicated trail shoe gives you much better grip and toe protection.
Is it okay to walk the hills when trail running?
Not only is it okay, it’s standard practice across the entire trail running community. Even elite ultramarathoners power-hike steep climbs because walking uphill with hands on your quads uses less energy than trying to jog up a steep grade at the same speed.
What is a good distance for a beginner’s first trail run?
Plan your first trail run by time rather than mileage, aiming for 25 to 40 minutes total. Because dirt paths and hills slow your pace down, a 3-mile trail loop can easily take as much time and energy as a 4- to 5-mile road run.
How do I avoid tripping on roots and rocks?
Keep your eyes scanning the trail 10 to 15 feet ahead rather than staring straight down at your shoes, which gives your brain time to map out safe foot placements. Shorten your stride, pick your feet up slightly higher than you do on smooth pavement, and avoid zoning out when you’re tired near the end of a run.
What should I carry on a beginner trail run?
Even on a short 30-minute loop, carry a charged phone with an offline trail map downloaded, a handheld bottle or small hydration vest with water, your ID, and a simple snack or energy gel in case a wrong turn adds extra time to your outing.
